Why Small Gaps Have a Big Impact
You probably can't see the air leaking out of your home, but you can feel it - the cold draft near the front door, the room that never quite warms up, the energy bills that seem high for how little you're running the heat. Collectively, the cracks and gaps in a typical US home can add up to the equivalent of leaving a window open year-round, according to general guidance from the US Department of Energy.
The good news: sealing those gaps is one of the most cost-effective home improvements you can make, and most of it is firmly in DIY territory. This guide focuses on two core techniques - caulking (for stationary surfaces) and weatherstripping (for moving parts like doors and windows) - plus how to track down the leaks in the first place. For a broader look at where energy escapes through less obvious routes, see our article on overlooked gaps that drive up energy bills.
What you will need
Tools and Materials You'll Need
You don't need a contractor's toolkit to seal air leaks effectively. Here's what to have on hand before you start.
Caulk gun
Dispenses caulk in a controlled bead along gaps and seams.
Silicone or latex caulk
Fills stationary cracks around window frames, door casings, and wall penetrations.
Weatherstripping tape or V-strip
Seals the moving edges of doors and windows to block airflow when closed.
Door sweep
Seals the gap between the bottom of an exterior door and the threshold.
Utility knife or putty knife
Removes old caulk and trims weatherstripping to length.
Painter's tape
Masks edges for a cleaner caulk line and marks draft locations during inspection.
Rubbing alcohol or mild cleaner
Cleans surfaces before applying caulk or adhesive-backed weatherstripping so they bond properly.
Incense stick or thin candle
Detects air movement near suspected gaps during the draft inspection.
When choosing caulk, match the type to the surface: silicone caulk is flexible and moisture-resistant, making it ideal for bathrooms, kitchens, and exterior gaps. Latex (acrylic) caulk is easier to apply and paint over, better suited for interior trim and drywall joints. Avoid general-purpose caulk in areas that see significant temperature swings or moisture.
For weatherstripping, foam tape is the easiest to install and works on most door and window channels. V-strip (tension seal) is more durable and better for gaps that flex when a door closes. Door sweeps seal the gap at the bottom of exterior doors.
Finding the Leaks Before You Seal Anything
Sealing randomly wastes time and materials. Spend 15-20 minutes doing a systematic draft check first.
On a cold or windy day, hold a lit stick of incense or a thin candle near suspected problem areas. Smoke or flame movement indicates airflow. Check: the perimeter of every exterior window and door frame; where walls meet the floor and ceiling on exterior walls; around electrical outlets and switch plates on exterior walls; pipe and wire penetrations through walls (under sinks, behind appliances); attic hatches and pull-down stairs; fireplace dampers and surrounding trim.
Test the Whole House, Not Just the Obvious Spots
Electrical outlets on exterior walls are a surprisingly significant source of air infiltration that many people overlook. Remove the cover plate and check for drafts - foam outlet gaskets are an inexpensive fix. Attic hatches and pull-down stairs are another major leak point worth checking even if they feel out of sight and out of mind.
Mark leaky spots with painter's tape as you go so you have a clear checklist when you return with materials. This full-home perspective pairs naturally with the seasonal maintenance walkthrough, which helps you schedule these checks at the right time of year.
Step-by-Step: Sealing Gaps and Replacing Weatherstripping
Work through stationary gaps first (caulking), then movable joints (weatherstripping). Take your time on surface prep - it determines whether the seal holds for one season or many.
Remove old caulk and weatherstripping completely
Use a utility knife or putty knife to cut away and peel off existing caulk. Applying new caulk over old, failing material is one of the most common mistakes - it prevents proper adhesion and the new bead will fail in the same way. For weatherstripping, peel off adhesive-backed foam and use rubbing alcohol to clean the adhesive residue from the channel.
Clean and dry all surfaces thoroughly
Wipe down every surface you plan to caulk or tape with rubbing alcohol or a mild cleaner. Remove dust, grease, and loose paint. Allow the area to dry completely - caulk and adhesive weatherstripping both require a dry, clean surface to cure and bond correctly. In humid areas, give surfaces at least 30 minutes after cleaning.
Apply painter's tape for a clean caulk line (optional but recommended)
For visible areas like window trim or door frames, run a strip of painter's tape on each side of the gap, leaving just the gap itself exposed. This gives you a straight, professional-looking bead. Once you smooth the caulk, remove the tape before it dries - typically within a few minutes of application.
Cut the caulk tube nozzle and load the gun
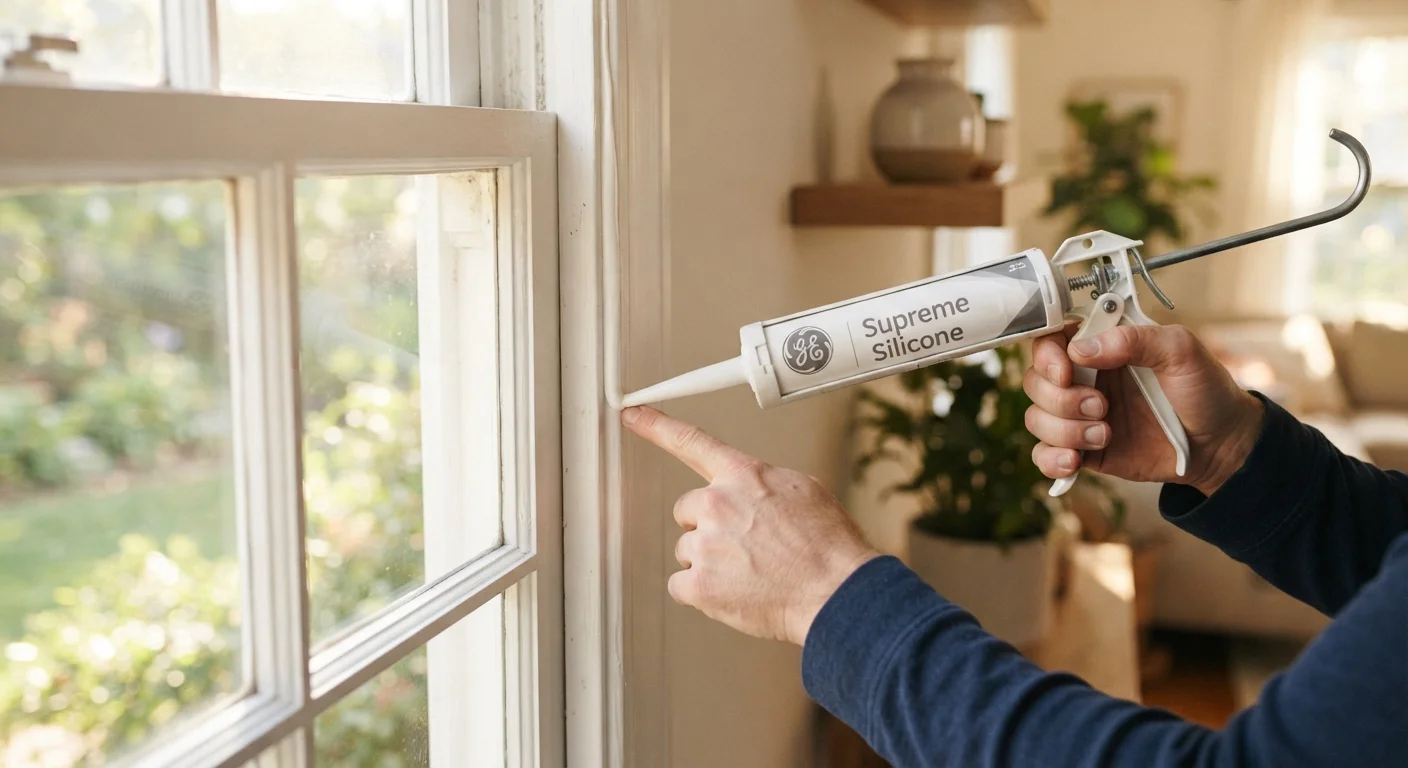
Cut the nozzle at a 45-degree angle, starting with a small opening (about the diameter of the gap you're filling). A smaller opening gives you more control. Pierce the inner seal with a nail or the built-in puncture tool on most caulk guns. Load the tube into the gun and squeeze the trigger gently until caulk reaches the nozzle.
Apply caulk in a steady, continuous bead
Hold the gun at 45 degrees to the joint and move it steadily along the gap as you squeeze the trigger. Maintain consistent pressure and speed. Work in one continuous pass where possible - starting and stopping creates gaps and uneven texture. For corners, apply slightly more caulk since corners are prone to cracking over time.
Smooth the bead and remove tape
Wet your fingertip or a caulk smoothing tool and run it along the bead in one pass to press it into the joint and create a concave surface. A concave bead sheds water and flexes better than a raised one. If you used painter's tape, remove it now - pulling it away at a 45-degree angle while the caulk is still wet.
Install or replace weatherstripping on doors and windows
Measure the door or window perimeter and cut weatherstripping to length with scissors or a utility knife. For foam tape, peel the adhesive backing and press firmly into the door stop (the raised edge the door closes against) - not the door itself. For V-strip, fold it open slightly and fit it into the channel so it springs against the door when closed. Install a door sweep on the interior face of any exterior door with a visible gap at the bottom: measure, cut to width, and fasten with the provided screws.
If your caulk begins to crack or peel within a season or two, that usually points to surface prep or product mismatch issues rather than a failed technique. Our follow-up article why your caulk keeps cracking walks through the most common causes and how to fix them.
Renters: What You Can (and Should) Do
If you rent, you still have good options - but a few guardrails apply. Removable foam weatherstripping tape leaves no damage and is almost universally acceptable. Door draft stoppers (the fabric tube-style) require no installation at all. For caulking or adhesive-backed products, check your lease and ask your landlord first; many are happy to have a tenant address drafts, and some may even cover materials.
Don't Seal Gas Lines or Combustion Vents
Never caulk around gas pipes, combustion air vents, or exhaust flues - these require clearance for safety and ventilation. Any gaps around gas infrastructure should be assessed by a licensed professional, not sealed with DIY materials. If you're unsure whether a penetration is a combustion vent, err on the side of caution and consult a qualified contractor.
Whatever your tenure, air sealing is a project with a strong payoff-to-effort ratio. For a clear-eyed take on which home improvements are genuinely worth doing yourself versus when to call a pro, see our guide on DIY home maintenance decision-making.