Why Caulk Failure Matters More Than You Think
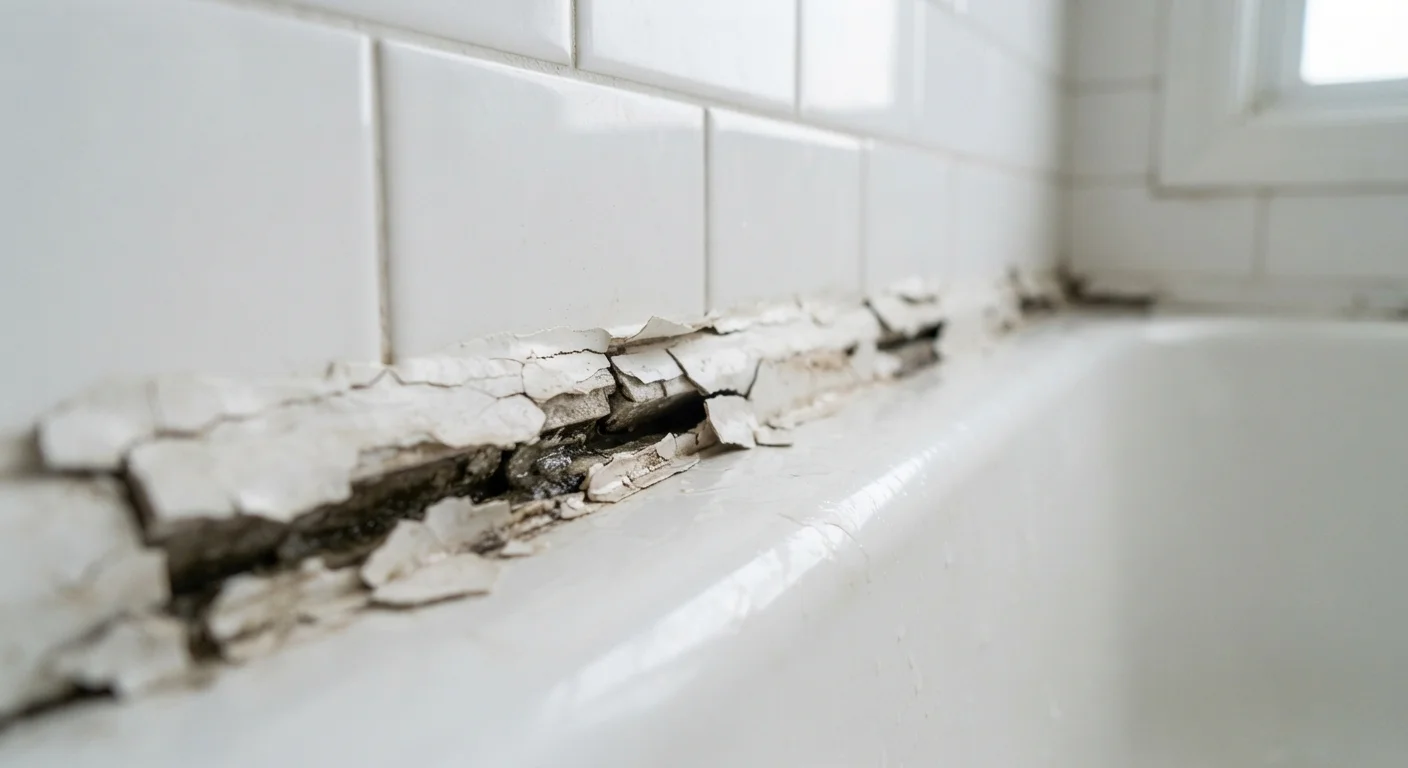
Caulk is one of those maintenance items that's easy to ignore until it looks really bad. A few cracks along the tub, some lifting near the windowsill — it seems minor. But those gaps are where water finds its way in, and water in the wrong place causes damage that goes well beyond aesthetics.
The good news: recaulking is genuinely achievable for most renters and first-time homeowners. The bad news is that doing it the wrong way — which is surprisingly common — often results in caulk that fails again within a season. If your caulk keeps cracking no matter how many times you redo it, the issue is almost certainly technique, not the product itself.
Cracking caulk in wet zones is also closely tied to your home's broader moisture defense. If you're working on sealing up your space more comprehensively, see our guide on weatherproofing overlooked gaps around your home — caulk is just one piece of that picture.
Moisture Damage Can Follow Failed Caulk
A cracked or missing caulk line in a wet area like a shower or tub surround is an open invitation for water to reach the wall behind the tile. Over time, this can lead to mold growth, rotting drywall, or structural damage that's far more expensive to repair than a simple recaulk. Don't treat peeling or cracked caulk as just a cosmetic issue — address it promptly.
The Most Common Caulking Mistakes — and How to Fix Them
Most caulk failures trace back to a handful of repeatable errors. Understanding them before you pick up a caulk gun makes the difference between a seal that holds for years and one that cracks by spring.
Applying new caulk directly over old, failing caulk without removing it first.
Why it happens: It feels faster to just run a fresh bead over the old one, and the result looks fine initially — so many people assume the job is done.
Skipping surface preparation — caulking over damp, dirty, or oily surfaces.
Why it happens: Surfaces look dry to the eye even when they still hold moisture, especially porous grout or stone. Cleaning seems like an optional step when you're eager to finish.
Choosing the wrong type of caulk for the location.
Why it happens: Caulk tubes at the hardware store look nearly identical, and terms like 'all-purpose' can give the impression that one product works everywhere.
Applying a bead that's too thick, then leaving it rounded or unpressed.
Why it happens: People assume a bigger bead means a better seal. Without tooling the bead, the surface cures but the interior remains soft, making it prone to shrinkage cracks.
Not allowing adequate cure time before using the area.
Why it happens: Caulk feels dry to the touch within an hour or two, which creates the false impression that it's ready for water or stress.
Don't Caulk Over Mold or Active Moisture
If you see black staining or smell mildew behind failing caulk, sealing over it traps the problem rather than fixing it. Scrub the area with a mold-killing cleaner, allow it to dry completely — at least 24 hours — and identify any source of ongoing moisture before recaulking. If mold covers a large area or has penetrated the wall, consult a professional.
One area where caulk and grout problems get confused: tile joints. Grout and caulk serve different purposes and fail differently. If you're not sure which issue you're dealing with, our article on when to clean versus re-grout tile can help you diagnose before you commit to a repair approach.
Getting It Right: A Quick Recap Before You Start
A successful recaulk job comes down to three things: full removal of the old material, thorough surface prep, and patience during cure. None of these steps are technically difficult — they just require resisting the urge to rush.
~5 years
Typical lifespan of quality caulk in wet areas
Many home improvement resources suggest inspecting bathroom and kitchen caulk every three to five years, as even well-applied caulk eventually degrades with heat, moisture, and movement.
24–48 hrs
Minimum cure time before water exposure
Most silicone and latex caulk manufacturers recommend waiting at least 24 to 48 hours before exposing a fresh bead to water, though full cure can take several days.
Before you start, gather what you need: a caulk removal tool or utility knife, rubbing alcohol and clean rags, the right caulk for your specific location, a caulk gun, and a smoothing tool or a gloved finger. Taking 10 minutes to set up properly saves you from redoing the job three months from now.
When in doubt about which product to use, read the label carefully — most caulks clearly list their intended applications. If you're caulking a joint that experiences significant structural movement (like where a wall meets a floor), look specifically for a caulk rated for dynamic joints, as standard formulas can crack under repeated stress.