Why a Balcony Herb Garden Makes Sense
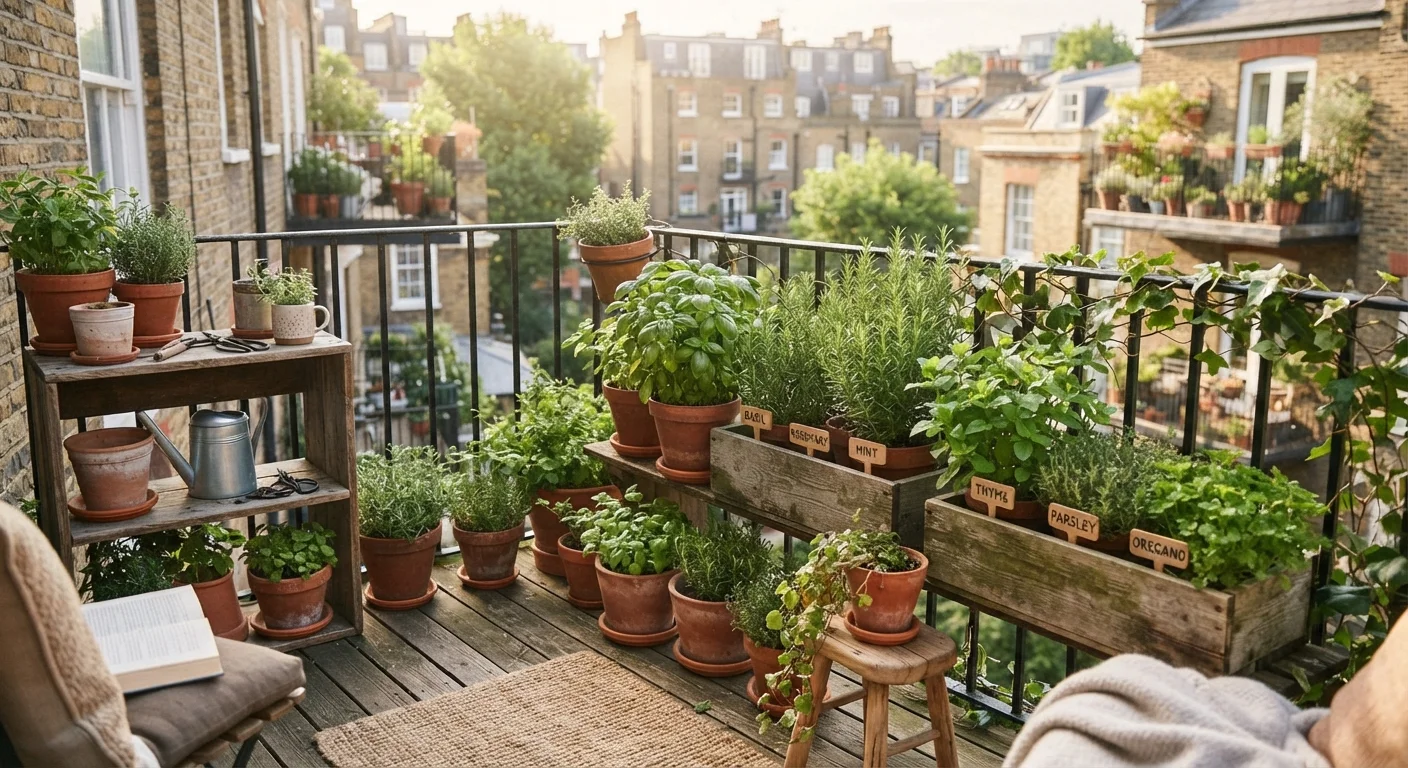
A herb garden is one of the most practical outdoor projects a renter or first-time homeowner can take on. It requires minimal space, costs relatively little to set up, and pays off quickly - there's a real satisfaction in snipping fresh basil into a pasta dish or dropping homegrown mint into a drink. Unlike larger growing projects, herbs are forgiving enough that early mistakes rarely spell permanent failure.
If you're curious how container growing compares to other approaches, our guide on raised beds vs. in-ground planting explores how each method suits limited outdoor space. And for a broader look at what edible plants genuinely work in compact urban settings, growing food in a small space sets realistic expectations before you invest time and money.
Check Your Lease Before You Plant
If you rent, review your lease agreement before adding anything to your balcony. Some landlords restrict permanent fixtures, heavy planters, or structural modifications like railing-mounted boxes. A quick conversation with your landlord can save you a security-deposit headache later.
What You'll Need Before You Start
Gather your tools and materials before planting day so the process stays smooth. The list is short, and most items are reusable season after season.
What you will need
Containers with drainage holes
Hold soil and plants while allowing excess water to escape, preventing root rot.
Potting mix (not garden soil)
Provides the light, well-draining structure that container herbs need to thrive.
Saucers or drip trays
Catch drainage water to protect balcony surfaces and avoid runoff complaints from neighbors below.
Watering can with a narrow spout
Allows precise watering at the soil level without splashing foliage unnecessarily.
Slow-release granular fertilizer
Feeds herbs steadily over the growing season without requiring frequent liquid applications.
Small trowel
Used for transplanting seedlings and mixing amendments into potting mix.
Plant labels or markers
Keep track of which herb is which, especially useful when plants are young and look similar.
Mind Your Balcony's Weight Limit
Large containers filled with wet soil can be surprisingly heavy. Check your building's load rating - typically listed in the lease or available from your building manager - before arranging multiple sizeable pots. Distribute weight toward structural supports and walls rather than the balcony's center or outer edge.
Step-by-Step: Setting Up and Maintaining Your Herb Garden
Follow these steps in order for the best results. The early decisions - sunlight assessment, container choice, and growing medium - have an outsized impact on how well your herbs perform all season.
Start With Three or Four Herbs, Not Ten
It's tempting to grow everything at once, but starting small lets you understand each plant's needs before scaling up. Basil, chives, mint (in its own pot - it spreads aggressively), and parsley make an excellent first-season lineup that covers a wide range of cooking uses.
Assess your sunlight and space
Before spending a dollar, spend a day watching your balcony. Track how many hours of direct sun it gets and which direction it faces. South- and west-facing balconies typically get the most light - ideal for Mediterranean herbs like rosemary, thyme, and oregano. East-facing spaces get gentler morning sun and suit parsley, chives, and mint reasonably well. North-facing balconies with fewer than four hours of sun are challenging; stick to shade-tolerant herbs like lemon balm or chervil.
Choose your containers
Select containers at least 6 inches deep for compact herbs like thyme or chives, and 10-12 inches deep for basil, parsley, or rosemary, which have larger root systems. Every container must have drainage holes - this is not optional. Terracotta pots breathe well but dry out faster; plastic and glazed ceramic retain moisture longer. Window boxes work well for rail mounting if your building permits it, but confirm weight limits first.
Fill with the right growing medium
Always use a bagged potting mix, not soil dug from a yard or garden bed. Garden soil compacts in containers, cutting off air and drainage. Look for a mix labeled for vegetables or herbs - these tend to be lighter and drain more freely. For drought-tolerant herbs like rosemary and thyme, mix in about 20-30% coarse perlite or grit to improve drainage further. Fill containers to within an inch of the rim to leave room for watering.
Plant your herbs
You can start from seed or buy young starter plants (called transplants or starts) from a nursery. For beginners, transplants are more forgiving and give you a visible head start. Plant at the same depth the herb sat in its nursery pot - burying the stem too deep can cause rot, and planting too shallow exposes roots. Firm the soil gently around each plant and water immediately after planting to settle the mix around the roots.
Establish a watering routine
Stick your finger about an inch into the soil. If it feels dry, water thoroughly until it drains from the bottom. If it still feels moist, wait another day. Container herbs dry out faster than in-ground plants, especially in summer heat, so you may need to water daily during hot spells. Overwatering is the most common beginner mistake - yellowing lower leaves often signal waterlogged roots, not thirst. Water at the base of the plant rather than overhead to reduce the risk of fungal issues.
Harvest correctly to keep plants productive
Begin harvesting once a plant has enough foliage that removing some won't stress it - generally when it has at least six to eight healthy leaves or stems. Always cut just above a leaf node (the point where a leaf or branch meets the stem). This triggers the plant to branch out and produce more growth. Never remove more than one-third of the plant at a time. For basil specifically, pinch off flower buds as soon as they appear - once a basil plant flowers, leaf production slows and flavor fades.
Once the growing season winds down, use our end-of-season garden checklist to properly close out your containers and protect any perennial herbs like rosemary or thyme from frost damage.