Why Prep Work Is the Actual Job
Most paint problems — peeling, streaking, blotchy color, visible patches — trace back to skipped prep, not bad technique or cheap paint. A well-prepped surface gives paint something solid to grip, and a smooth, clean wall means the finish reflects light evenly instead of telegraphing every imperfection underneath.
If you're new to home improvement projects, it helps to understand which tasks you can genuinely tackle yourself before diving in. Our overview on knowing when DIY is smart is a useful starting point for calibrating your confidence correctly. Room painting sits firmly in approachable DIY territory — but only when you follow the full process, not shortcuts.
Renters: Check Your Lease First
Many leases require landlord approval before painting or making wall modifications. Painting without permission can result in deductions from your security deposit or other lease violations. Get any approval in writing, and ask specifically about acceptable paint colors and required restoration at move-out. Our guide on wall modifications for renters covers related considerations worth reviewing.
For a broader look at approaching unfamiliar projects with the right habits and safeguards, see our guide on tackling home improvement projects you've never done before.
Older Homes May Contain Lead Paint
Homes built before 1978 may have lead-based paint on walls, trim, or ceilings. Sanding or scraping such surfaces can release hazardous dust. If you suspect lead paint, do not sand or disturb the surface — contact a certified lead abatement professional and consult your local health department guidelines before proceeding.
Before you open any cans, gather what you need.
What you will need
Paint roller and frame (9-inch)
Applies paint quickly and evenly across large flat wall surfaces.
Angled trim brush (2–2.5 inch)
Used for cutting in along edges, corners, trim, and ceiling lines.
Painter's tape
Masks trim, outlets, and ceiling lines to protect surfaces from paint bleed.
Drop cloths
Protects floors and furniture from drips and spills during painting.
Spackling compound and putty knife
Fills nail holes, dents, and minor wall damage before painting.
Fine-grit sandpaper (120–150 grit)
Smooths patched areas and scuffs glossy surfaces so primer and paint adhere properly.
Primer
Seals porous surfaces and fresh patches so topcoat color appears true and even.
Paint tray and liners
Holds paint for roller loading and makes cleanup faster with disposable liners.
Step-by-Step: The Full Painting Process
Follow these steps in order. Skipping or reordering them — particularly jumping straight to painting before surfaces are clean, patched, and primed — is where results fall apart.
Clean and inspect the walls
Wash walls with a damp sponge or sponge mop using a mild soap-and-water solution to remove dust, grease, and grime. Pay extra attention to areas around light switches, doorknobs, and kitchen-adjacent walls. Paint won't bond properly over dirty surfaces, so this step directly affects how long your finish lasts.
Once dry, look carefully for cracks, nail holes, dents, and peeling old paint. Mark each spot lightly with painter's tape so nothing gets missed.
Patch holes and repair surface damage
Apply spackling compound to nail holes and small dents using a flexible putty knife, pressing the compound in and dragging the blade flat to remove the excess. For cracks wider than a hairline, use a setting-type joint compound, which is more durable. Let all patches dry fully — typically 1–4 hours depending on depth and product.
Once dry, sand each patch smooth with 120–150 grit sandpaper until flush with the surrounding wall. Run your hand across the surface — you shouldn't be able to feel the edge of the repair.
Apply painter's tape and set up drop cloths
Run painter's tape along ceiling lines, baseboards, window frames, door trim, and any outlet covers you couldn't remove. Press the tape edge firmly with a putty knife or your fingernail to prevent paint from bleeding underneath — loose tape edges are the most common source of messy lines.
Lay drop cloths across the entire floor and drape furniture left in the room. Canvas drop cloths are more durable and don't bunch underfoot, though plastic sheeting works in a pinch.
Prime the walls
Primer is non-negotiable in three situations: you've made fresh patches, you're painting over a dark or saturated color, or you're working with bare or new drywall. Skipping primer in these cases leads to uneven coverage and color that looks blotchy even after two topcoats.
Apply primer with a roller using the same technique you'll use for paint (see Step 5). One coat of primer is usually sufficient. Let it dry fully per the manufacturer's guidance — typically 1–2 hours — before painting.
Cut in the edges with a brush
Before rolling, use your angled trim brush to "cut in" — painting a 2–3 inch band along all edges: ceiling line, corners, baseboards, and trim. This creates clean lines that a roller can't reach. Load the brush without overloading, and use long, confident strokes parallel to the edge.
Cut in one full wall section at a time rather than the entire room, so the brush work stays wet when you roll over it. This blending is what makes the transition invisible.
Roll the walls using a 'W' pattern
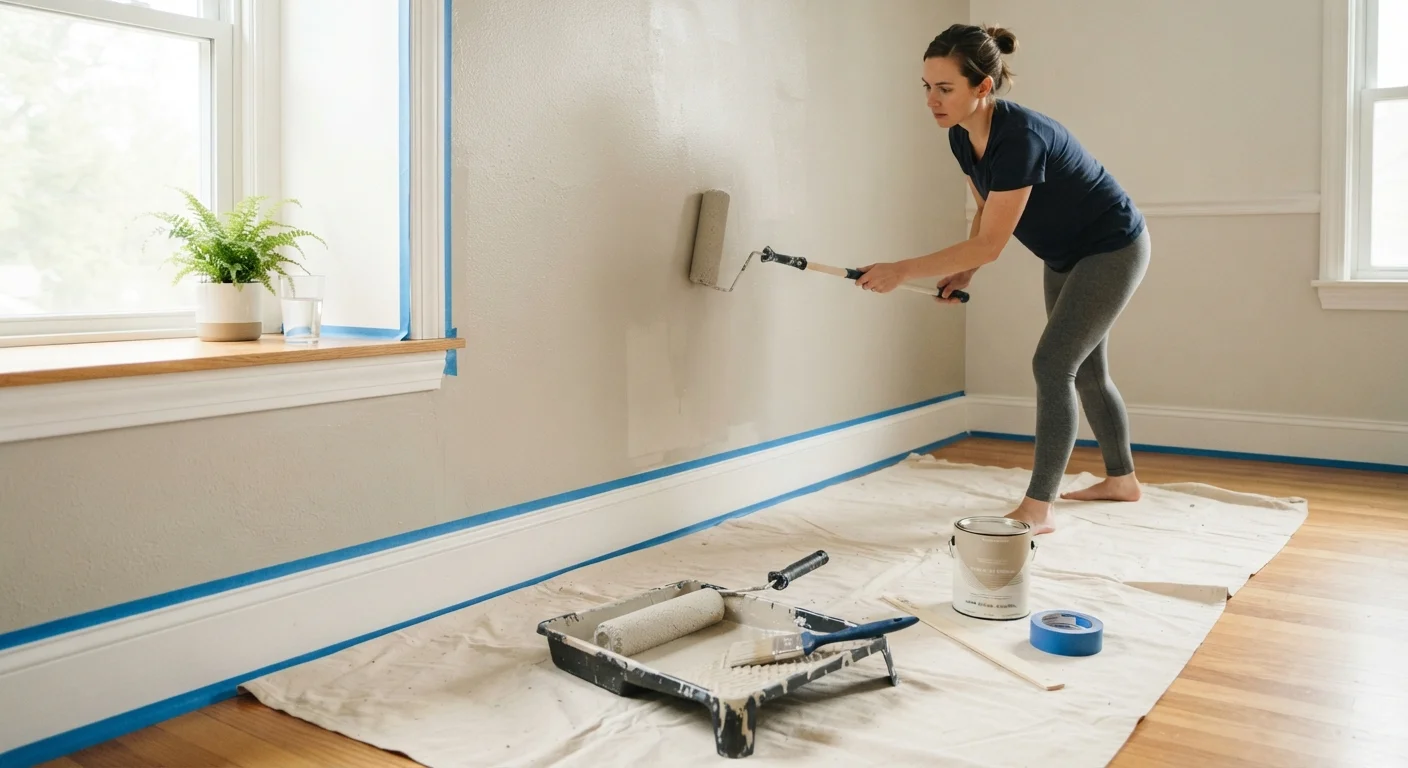
Load your roller by rolling it through the paint tray, then back on the ridged ramp section to distribute paint evenly — the roller should be saturated but not dripping. Start about 12 inches from a corner and roll a large "W" or "M" shape onto the wall without lifting the roller, then fill it in with overlapping strokes. This method distributes paint evenly without creating thick ridges.
Work in 3–4 foot square sections, always finishing each section with light upward strokes to smooth the surface. Keep a consistent pressure — don't press so hard the roller skids.
Apply a second coat
Let the first coat dry until it's no longer tacky — typically 2–4 hours for latex paint, though check your specific product. Then apply a second coat using the same cut-in-then-roll sequence. Two thin coats give better coverage, a more consistent sheen, and a more durable surface than one thick coat.
Once the second coat is fully dry (at least 24 hours before anything touches the walls), carefully peel tape at a 45-degree angle back over itself to avoid pulling the paint edge.
Keep a Wet Edge to Avoid Lap Marks
Lap marks form when paint dries at the edge of a stroke before you overlap it with the next pass. Work in manageable wall sections and maintain a wet edge by slightly overlapping each new stroke into the still-wet paint. On large walls, working with a partner — one cutting in, one rolling — keeps the pace consistent.
Once you've finished painting, the same thoughtful approach applies to what goes back on your walls. If you're renting, our article on what renters should know before hanging anything covers how to reattach wall decor without damaging your fresh finish or risking your deposit. And if the painting bug hits the bathroom next, the principles here translate directly — see what actually transforms a tired bathroom in our bathroom refresh guide.